For CrossFitters, handstand walks are a great way to challenge yourself and add an extra level of difficulty to your workouts.
But when it comes to handstand walks, a lot of people overemphasize the gymnastic form - this is where you’re perfectly vertical.
If you can do this, it’s perfectly fine, but if you’re not a pure gymnast, it’s not the easiest way to learn the handstand walk and may not be the most efficient and propel yourself forwards in competitions.
Instead, some of the most successful CrossFitters do the movement with bent knees and an arch in their torso - the goal here is to focus on moving forward and not the perfect body position.
It’s this form that I’m going to focus on in this article, which covers three drills that will help you to travel further with your handstand walk and eventually do them in WODs and competitions.

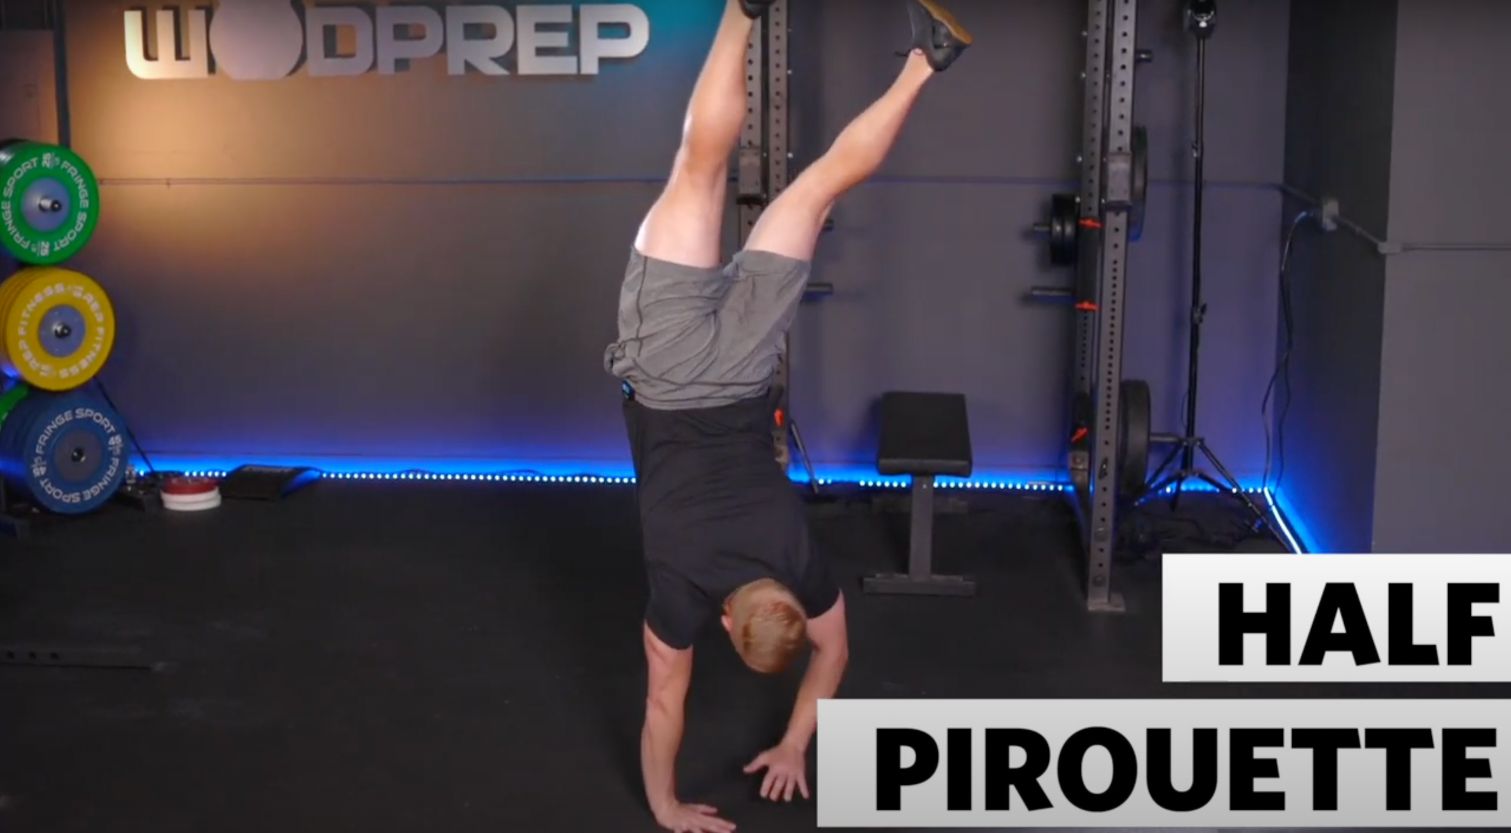
Drill one: the half pirouette
The first drill is all about learning how to fail.
If you understand your point of failure and know how to do it gracefully so that you don’t get injured, you will be much more successful in the long run.
A lot of people struggle with handstand walks because they’re too afraid to get past the point of no return - where gravity will begin to pull you forwards - and they’ll just end up kicking their legs up halfway.
That’s where the half pirouette can help.
To practice this, you’re going to kick up. Let your balance tip and pull you forward and do a couple of steps.
Then, get out of the handstand in a safe and controlled way by dropping your legs down to the side - so it looks like you’re doing the second half of a cartwheel as you dismount - instead of crumbling like a sack of potatoes onto the ground face first.
Practicing this is super important for building the confidence you need to build momentum up to move forwards because you know you’re not going to fall on your back and hurt yourself.
If you’re not comfortable moving your hands yet, it’s also fine to do this drill without taking any steps forwards - the whole point is to just get comfortable making a small turn in the air to let your feet come down at the side.
Do this, and you’ll have the foundations in place to really perfect your handstand walk.

Drill two: walk into the wall
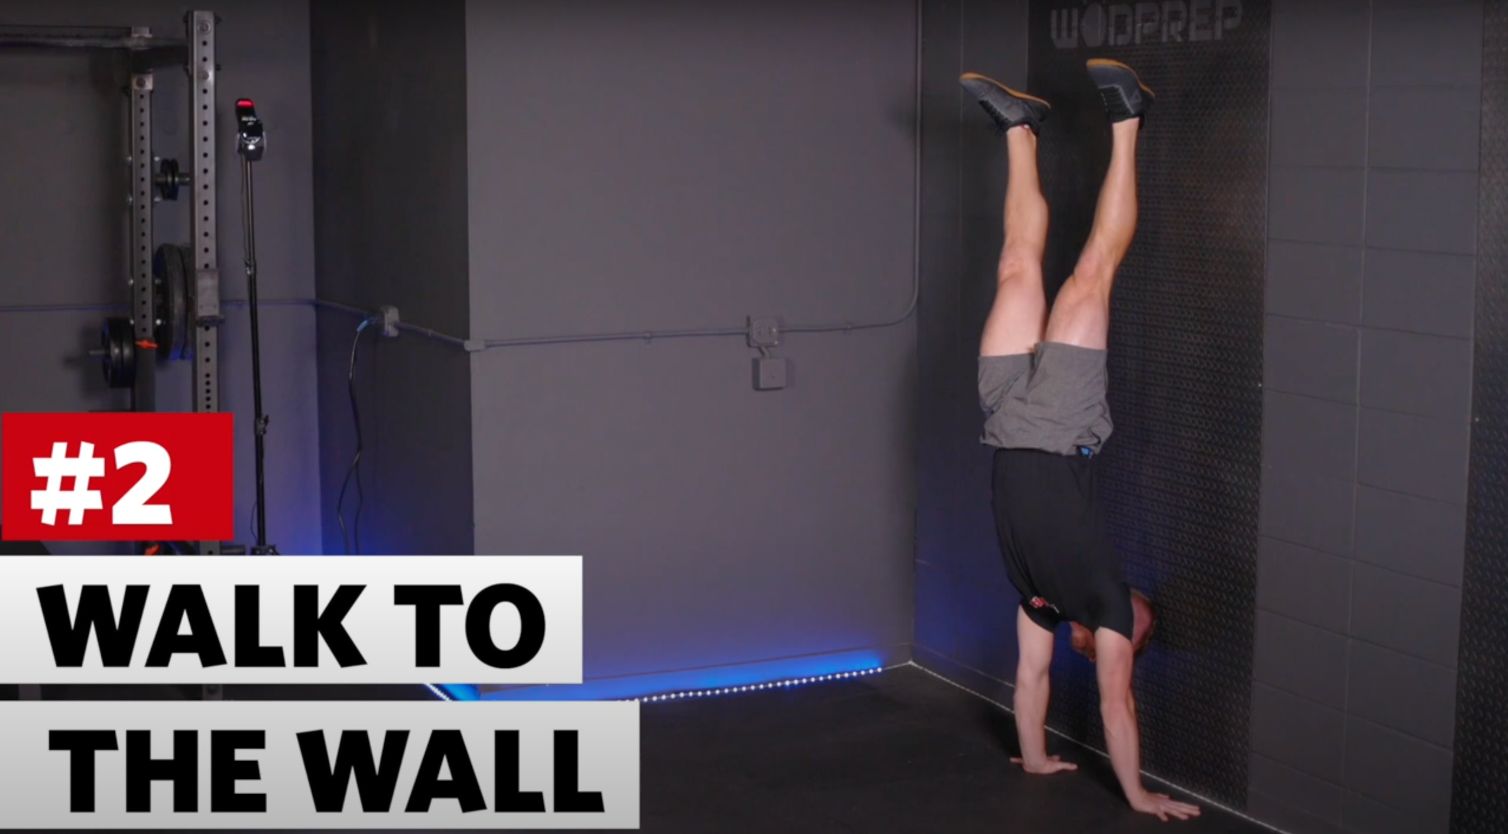
The second drill is walking into the wall.
This is one of the best drills for those who are working on the first few steps of their handstand walk - so if you’re stuck doing just one or two feet and want to expand that to five or maybe ten feet, this one’s for you.
The walking into the wall drill is pretty much as simple as it sounds - you just kick up into your handstand a few feet away from a wall and walk into it. Doing this protects you from flipping over.
When you’re starting out, you want to make sure you’re starting close to the wall, so you only need to take one or two steps until you come into contact with it. Once you hit the wall, find some balance, take a second and come down.
When you feel comfortable walking that distance, you can begin to start further back, and again, kick up, and walk into the wall until it’s making contact with your body and stabilizing you. The reason you want that wall there is because you have something there to catch you.
This drill really continues to lay into that mental foundation of being comfortable with your feet on the other side of that centre of gravity.
When you can do this consistently from around eight feet away from the wall, it’s time to move on to drill three.

Drill three: use a spotter
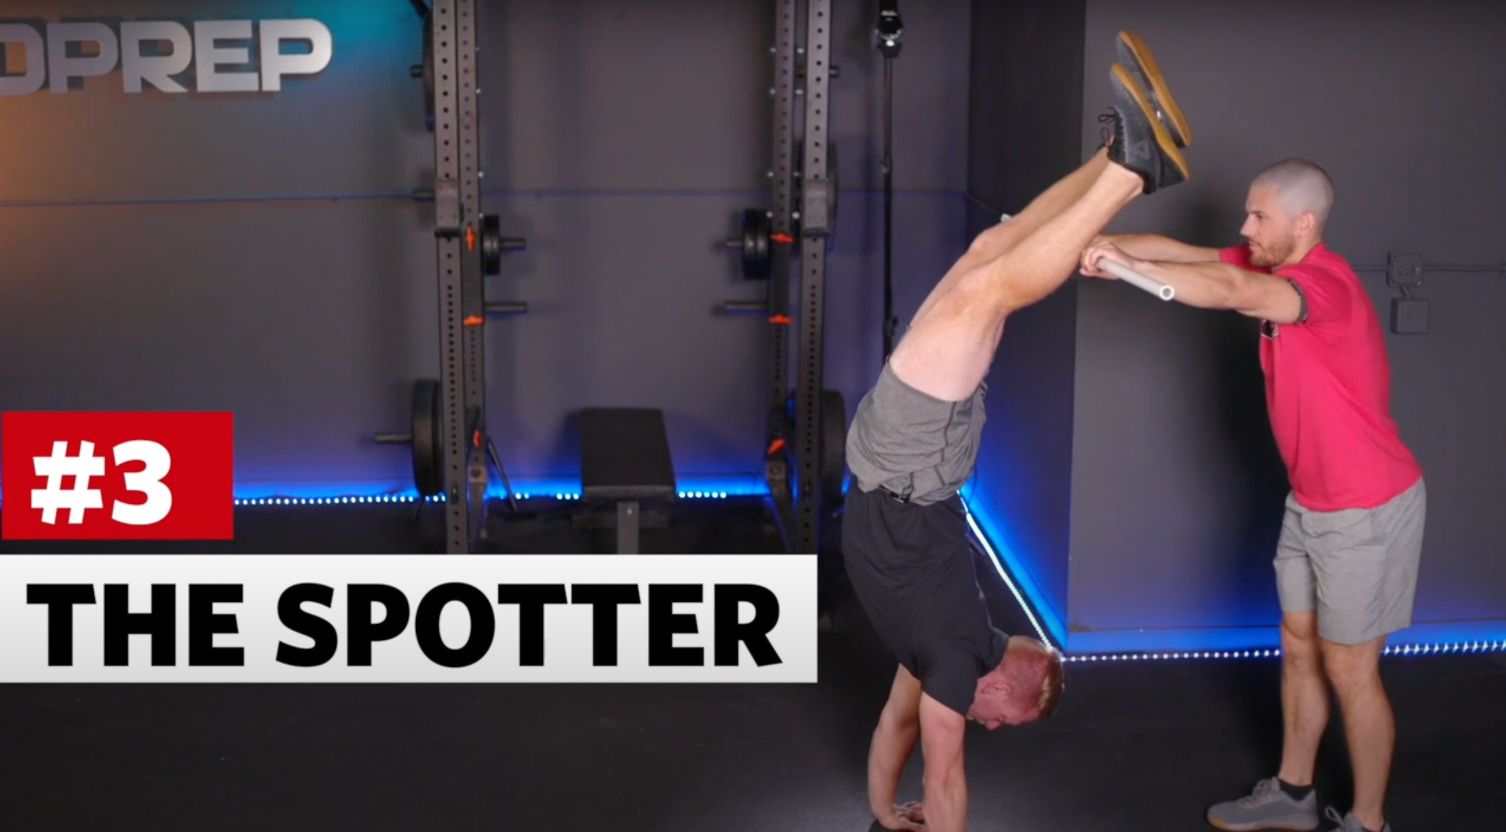
The final drill I’m going to take you through is using a spotter. This is one of my personal favorites because it’s helped me learn how to do handstand walks for very long distances.
To do this drill, you’ll need a PVC pipe, a broomstick, or something similar.
Your spotter will need to stand in front of you (about 1.5 meters away), holding the PVC pipe horizontally with braced, outstretched arms.
When you kick up into your handstand walk, your legs will make contact with the pipe. It’s a good idea to have the pipe sitting around the middle of your calf muscle.
Once you make contact, you can begin to walk forwards while your spotter works their way backwards while maintaining contact.
Here, your spotter is acting like the wall to stabilize you, but because they’re moving backwards, you can keep walking for as long as you want with the reassurance that you’re not going to flip over.
However, having a spotter doesn’t give as much support as a wall, so you’ll need to maintain your balance by keeping your core tight and your glutes engaged. And when you do kick up, make sure it’s not too hard so that your spotter can stay right on that other side of your balance point to support you without having to prop you up completely.
This is a great way to safely learn how to do long-distance, unbroken handstand walks.
Once you’ve progressed and are on the edge of doing completely unbroken and unassisted handstand walks, you can touch the PVC pipe when you kick up and then your spotter can begin to back up while leaving enough room and separation where you’re not even touching the pipe. You’ll just know your spotter is there in case you fall too far forwards.
To summarize
Follow these three drills, and you’ll be on your way to handstand walking like a pro in no time. Just remember to keep practicing, because the only way to really get good at handstand walks is by doing it over and over again!
Ready to get started? Make sure to check out our free handstand walk guide.
Or, if you want extra support, try our full-blown 8-week handstand walk course, Handstand Walk Hero, which will help you to build confidence and nail the handstand walk - or your money back. A win-win if you ask us!
