Wall walks is a new(-ish) movement that has popped up into the CrossFit scene over the last few years.
If you don't have the wall walks in your 'toolkit' of movements that you can do, as RX, then you will be left scaling a lot of workouts or struggling in misery during workouts, especially in the CrossFit open.
In this article, I have a simple six-step-by-step progression guide that will help you no matter where you are along your wall walk journey.
Hopefully, it will unlock the next step so that you can eventually do multiple unbroken wall walks efficiently and smoothly in the middle of the workout.
Step 1: Starting Position For Wall Walks
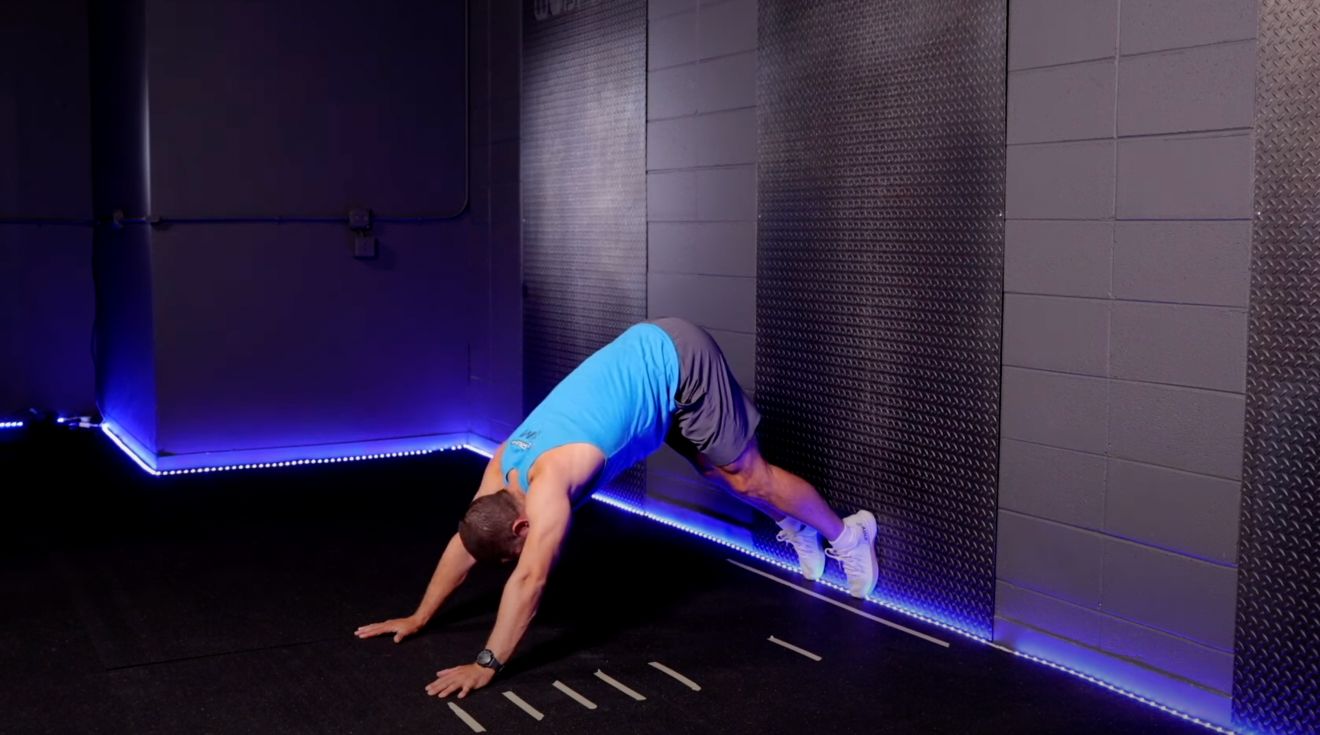
Step number one, when it comes to wall walks, is when you're lying on the ground in the starting position, which means feet on the wall, hands on the line if you have the lines on the floor, or just hands right by your shoulders, the first thing that we need to do is to get into a downward dog position.
I often see athletes miss this starting position.
But the most efficient way to get into the wall walk is by doing that.
So imagine I'm on the ground, my feet are against the wall, and then all I'm going to do is press myself up onto my knees and then lift my knees off the ground.
So this is what some of you might recognize as the downward dog position.

Step 2: Getting Your Feet Off The Ground
One of the more challenging steps is getting both feet off the ground.
To do this, you need to take your right and left foot and get them off the ground; then, only then, are you allowed to start moving your hands past the line.
I find that a lot of athletes will actually start moving their hands too early, their feet will still be on the ground, and they'll actually begin to walk their hands back towards the wall; that's technically a no rep, both of your feet need to get off the ground.
So especially when I'm tired and in the middle of the workout, I focus on the downward dog and then getting both feet off the ground.
Once both feet are off the ground, I try to straighten my legs.
Step 3: Straighten Your Legs
When my feet are first getting off the ground, I have lots of bend in the knees, and it's actually a pretty awkward position.
It's easiest for you to relieve that awkward position by immediately trying to get your legs straight.
Then once you have your legs straight, it's time to start moving your hands.
Step 4: Move Your Hands
Let's walk through my guide so far again. So a nice sleeping on-the-ground position and into a downward dog and then getting both feet off the ground.
Moving your hands could be baby steps, especially if you're uncomfortable with being upside down, it could be like a couple inches, and then from there, my goal is to drive my head through as my legs straighten out. Now that I have relatively straight legs, I start walking my hands to the wall.
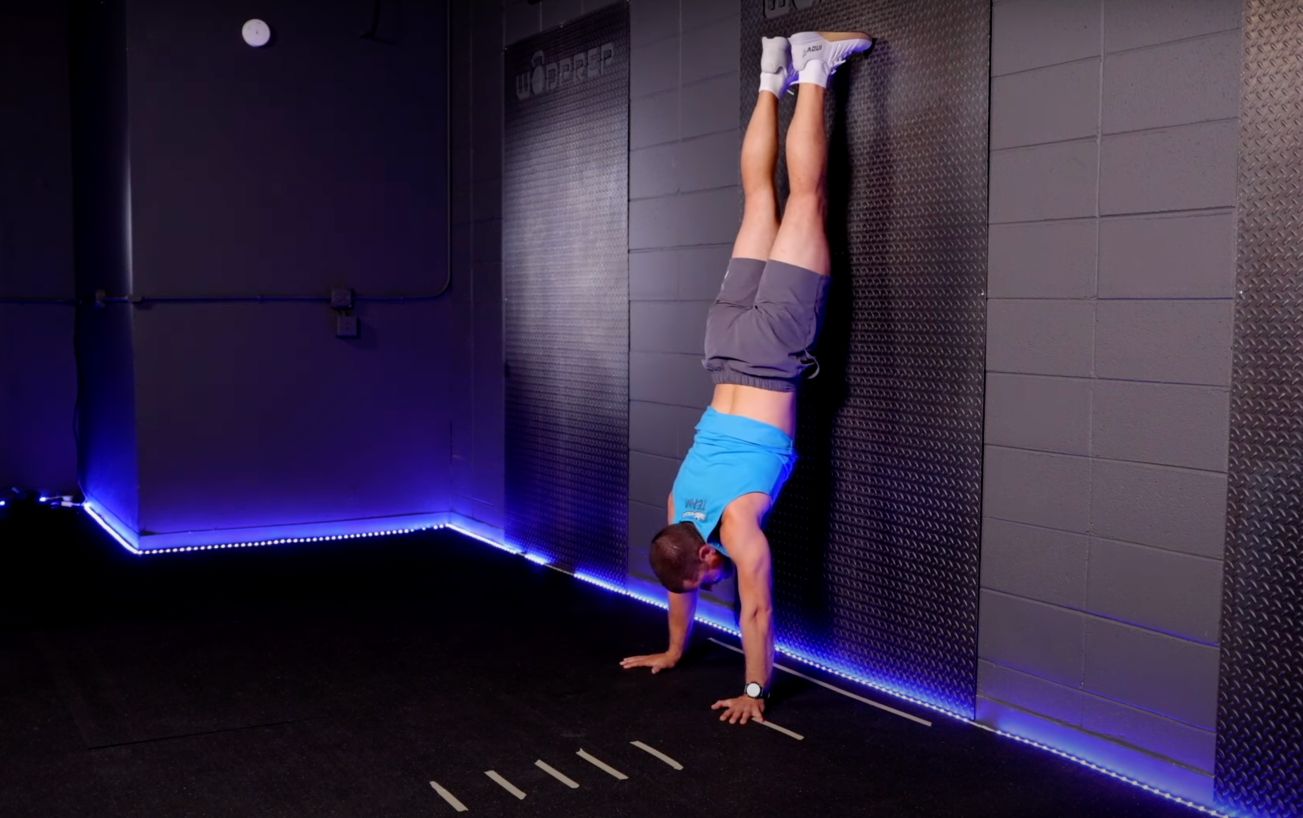
So as I straighten my legs out simultaneously, I start pressing and walking my head and torso back toward the wall. This is when you actually begin to see the walk happen with your hands.
Step 5: Wall Walk Progression
Here's where many beginners can do a great job of adding progressions by adding tape lines on the floor to help.
So the standard for a wall walk is usually the line about where your shoulders are, where the starting line is, and then the finish line.
Where the wrap is halfway complete is right next to the wall. And I'm not going to mention the specific standards because they might change, but you have a line or some measurement where your hands are close enough to the wall for it to count.
To complete the wrap, you must get your hands back to the original line before your feet touch the ground.
Your hands start on the line, you'll walk your hands all the way to the wall or the line next to the wall, and then, you walk your hands back to the original starting line before your feet touch the ground.
So what I'm suggesting in terms of a progression for all the beginners out there is to make a series of lines, and you can label them level one, level two, level three, level four, through infinity all the way until the RX line.
And your goal is to become proficient at getting to a line and back, even if that line is pretty close.
If I were a brand new wall walker, I would start my hands at the initial starting line. And then, from there, I will get my downward dog.
I get my hand past the first line, and then I can tend to walk back down. So that'd be a great level on the progression of a wall walk.

Now let's move to this one.
Same thing, downward dog, both feet off the ground. I would straighten my legs out a bit more, maybe a couple of steps, to get both hands past that second or third line.
And then, I'm going to walk my hands back to the original starting position.
So what we're doing there, for most of the movements that I teach progressions for, is trying to take a significant move, which is an entire wall walk, and I break it into its individual pieces, and then I find a way to scale it infinitely.
So rather than just saying you can or cannot do a wall walk, you could do a half-wall walk or 25% of the wall walk.
This is an excellent modification for people who, for whatever reason, can't quite get their hands all the way to the wall.
Making your target closer to the wall is similar to when we're doing Box Jump progressions, and we slowly but surely make the box higher and higher.
That's the same thing; I would move my goal target and give myself a standard that I can shoot for every workout rep.
If I was in the middle of a Metcon, rather than just estimating halfway, doing a half-wall walk, I now have a standard to measure myself to. And that's going to help keep you consistent, and it's going to help you eventually work your way to doing a fully RX wall walk.
We can take this progression and make it as straightforward or as hard as we want.
You'll notice that the scale division of the CrossFit Open tends to have the standard of getting your hands over the line and back. That's a great introduction to the wall walk.
But then we can add so many more layers and levels before we get to a fully RX wall walk.
Step 6: Splat Down
So far, we've gone over five steps and discussed modifying the wall walk for your skill level.
Let's talk about the full wall walk, assuming we are proficient at getting your hands maybe 75% of the way there.
As I walk with my hands to the wall, I'm only thinking about driving my head and chest into the wall.
And then, obviously, my goal is to get my hands to the target. But, a lot of times, what I see is that people will get their hands all the way to the target. But for whatever reason, their head is overextending, and their chest and hands don't even come close to the line.
You should realize that you don't want to spend much time in the totally vertical position; that's the most complicated position for the wall walk. So we want to get ourselves as close to the line and just touch the line and get back down.
Once we've driven our heads and shoulders into the wall, we get that simultaneous touch immediately. As soon as my hand touches, I aim to get out of that vertical position and get myself back down to the ground.
I run my hands forward and get them to the target line. So I'm getting them to that starting line.
Then as soon as my hands are there, I let my feet splat to the floor. We only want to spend the extra time inverted on the wall as we need to; it will cause us to get exhausted.
To summarize
With that being said, I hope that you've learned a few valuable skills, progressions, and tips to help you take where your wall walk is and finally be able to do an efficient wall walk repeatedly, time and time again.
If you liked this article and want more wall walk tips, I have a free video course. And if you want everything that WODprep has to offer, all of my best tips and tricks to help you learn all of the skills that come inside of a CrossFit gym.
Then join WODprep Academy, it's the best deal that we have. It's all of my best training material and training courses combined together into one place for one low annual costs.
Good luck!
