
Let’s talk toes to bar.
Odds are, toes to bar wasn’t a movement that you saw before stepping foot in a CrossFit® gym. And while the skill itself looks to be simple, getting the hang of it and stringing reps together is more difficult than it looks. To get rid of the difficulty, I’m going to share a simple toes to bar progression that will be useful if you’re still learning the skill.
First, let’s dive into a breakdown of the movement and what exactly it should look like.
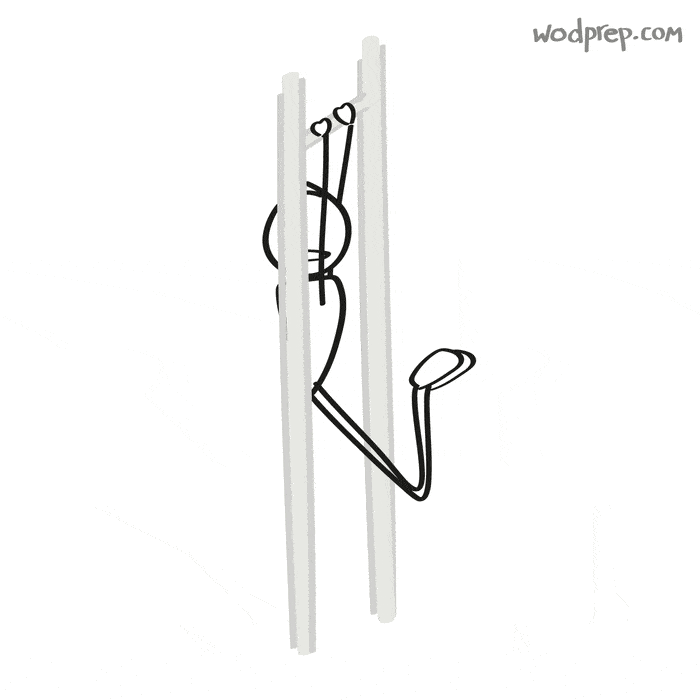
Toes to bar are done on a pull-up bar. The movement’s name pretty much describes itself; once you’re hanging from a pull-up bar, you simply (or not so simply) bring your toes up to the bar to achieve a rep.
Today, I’m going to lay out a simple toes to bar progression for you, from start to finish - as well as cover a very common error that occurs when attempting kipping toes to bar. So if you’re working on just getting your toes up to the bar… toes to bar for WOD’s… or struggling to string TTB together, then this article is for you.
>>> Want to join our 8-week Toes To Bar course and finally make some progress?! Head here.
Toes To Bar Technique
The key to becoming proficient at toes to bar is developing the correct technique and kip, so that you can do the movement fluidly and efficiently. Once you’re able to string toes to bar together, doing large sets in workouts will pay off and save tons of time.
However toes to bar (like so many things in CrossFit®) aren’t quite as easy as they look. Athletes approach the movement and believe that they can do unbroken toes to bar, no problem. “Wow, that looks so easy!”
However, here’s what normally happens...:
- Jumping onto the pull-up bar
- Flailing around like a maniac (and not engaging the right muscles)
- Doing whatever it takes to get their feet to touch the bar, usually resulting in each rep being followed by several swings.

Technically, if both your feet touch the bar, then it’s a rep. But at the end of of the day, swinging around like a wild person isn’t the safest thing to do on a pull-up bar…. especially if you’re not engaging your shoulders properly. Not to mention that in the long-term, it is not going to allow you to efficiently string reps together in workouts.
So instead of just jumping up on that pull-up bar and trying to get your toes to touch without a plan, let’s look at a simple toes to bar progression.
5 Step Toes to Bar Progression
Step 1: Beat Swings
Let’s start with a very small, yet crucial movement. Hop up onto the pull-up bar, with your hands about shoulder width apart. Keeping your core and legs tight, activate your shoulders and swing back and forth, working on switching between the hollow position, and the arch position.
If you don’t already know what hollow body is, be sure to check out this article where we detail the importance of it - and give you a few hollow body specific drills.

If you find yourself struggling to move back and forth between the hollow and arch position on the pull-up bar, try hopping off and doing the two movements on the floor, to get more comfortable with the way that they should feel.
Here’s a demo video of what beat swings should look like:
Step 2: Kipping Levers
This step of the progression is very similar to beat swings, yet with higher elevation during the hollow position. When working on kipping levers, try to really focus on activating your lats, which will give you the higher elevation of the shoulders and torso.
This movement doesn’t involve your legs at all, and you shouldn’t be using them to force a kip. However, you should be making sure to keep your legs and core tight, so that when you are levering back your feet stay slightly in front of the bar, glues together.

Focusing on the lever movement is important, since it’s making sure that you are able to fully pull your torso back, and make room for space needed to bring your legs and feet up to the bar. Without this lever, you’ll find yourself swinging around like a drunk Tarzan.
Step 3: Knee Raises
Once you get the hang of kipping levers, it’s time to start bringing those knees up. Make sure you’re continuing to active your shoulders and lats, and from there lift your knees slightly to your chest. The motion of bringing your knees up shouldn’t break the rhythm of your kip, so try to continue in a fluid motion.

Just to be clear, knee raises do not mean that your knees should be coming up all the way to your elbows, and definitely not the bar. In this step of the toes to bar progression, knees only need to be coming up to about your belly button or slightly higher, so that you can begin to get more comfortable with the movement. The goal is to show you that you can lift your legs and still maintain a steady kipping rhythm without adding extra swings between reps
Step 4: Knees to Chest
This is a similar movement to the knee raises, but you are now bringing your knees higher, and closer to your eventual goal of the bar. Again, the key to this step is to make sure that you’re able to maintain a fluid kip, while lifting your knees higher than the previous progression.
In order to get your knees up to your chest (you can even try to aim for your elbows if that helps) you are going to have to get a little more aggressive with your kip. An aggressive kip is going to be achieved through continued shoulder and lat activation, which will help to pull your torso far enough out of the way for your knees to come all the way up to your chest.
For this step, your shoulders will need more elevation and you’ll also have to change the timing of your kip (because it will take longer). As you increase the range of motion and change your kip timing, make sure you still feel balanced and controlled, not adding any extra swings between each rep. If you find yourself losing control, reduce the height of your knees slightly until you can maintain a steady, consistent kip.
NOTE: Yes, despite what some people say, it’s totally okay to bend your knees. While some gymnastic purists will want you to keep your knees straight and locked out throughout the entire range of motion, we’ve tested hundreds of athletes and have found this: bent knee TTBs are easier to cycle for a large majority.
Bent knee permission: granted. There, I said it.

Step #5: Toes To Bar
Once you make it this far, you’re ready to Rx toes to bar (High five!). Nothing much changes movement-wise from the earlier progressions, it’s just finally time to bring your toes all the way up to the bar.
A big cue here is to think about “flicking” your feet up to touch the bar. Don’t make the movement more than it is; the difference between step 3 and step 4 is just a tiny bit more movement from your feet. As long as you're maintaining a strong kip with engagement from your lats and shoulders, you’ll be able to get those toes up to the bar.

Remember, in order for toes to bar to count as an official rep, both of your feet must touch the bar at the same time.
Just like the previous step, your range of motion increases, which will change the timing of your kip slightly. You’ll need to adjust your timing a bit, and the best way to do this is with consistent practice. Even if you “miss” touching your toes to the bar sometimes, don’t worry, keep practicing and maintain the consistent no-tarzan-swing kipping rhythm.
Toes to Bar cue breakdown:
- Arch to hollow kip
- Pull down on bar & get shoulders up, tuck Knees high
- At the apex, flick toes to the bar
- Repeat
Here’s a full-length video covering the exact same TTB progression that we just walked through, in case you’re a more visual learner:
Kipping Toes to Bar: The Missing Piece
Once you’ve got a good grasp on the toes to bar movement, you’re ready to start stringing together larger sets. We frequently see a lot of high rep sets of toes to bar programmed in CrossFit® workouts. Let’s take a look at this older Open workout 13.4:
CrossFit® Open Workout - 13.4
Complete as many reps as possible in 7 minutes following the rep scheme below:
- Clean and jerk, 3 reps
- 3 Toes-to-bar
- Clean and jerk, 6 reps
- 6 Toes-to-bar
- Clean and jerk, 9 reps
- 9 Toes-to-bar
- Clean and jerk, 12 reps
- 12 Toes-to-bar
- Clean and jerk, 15 reps
- 15 Toes-to-bar
- Clean and jerk, 18 reps
- 18 Toes-to-bar...
If you can string together large sets of toes to bar, then you’re going to cruise through those bigger sets towards the end of the workout, no problem. Yet if you’re still stuck doing 3-4 reps at a time, 15 toes to bar can really slow you down (not to mention spending too much time hovering over the chalk bucket in between reps....).
So listen up. More often than not, if an athlete is struggling with stringing together several toes to bar in a row, it’s because they aren’t “pulling through the bar.”:
What do I mean by that?
You already understand the motion of hinging your body back, and flicking your feet up to touch the bar. During this part of the progression, you should also be pulling down on the bar with your lats to get elevation in your shoulders and torso. But when your body is coming back down under the pull-up bar, you need to then actively pull yourself back through… putting your body in a strong arched position.

“Pulling through” means that you’re actively setting your body up for the next rep. Think about using your shoulders and upper back to send your head and shoulders under the bar and “through the window” between your arms. While doing this, your feet are actively being pushed behind your body, ready to be snapped back into the next TTB rep.
So next time you're working on kipping toes to bar and losing your kip, swaying back and forth, losing momentum, etc., try focusing on this one key:
Pull through.
Toes to Bar Progression Wrap Up
Next time you find yourself wondering how to do toes to bar in a WOD, try out this five step progression! Start simple, work through the movement step by step, and see if it all comes together for you. There’s a chance that you’re missing small yet critical pieces of the technique, that might be making the movement way harder for you than it really is.
Now, go find a pull-up bar and start working on getting your toes to bar done the right way. Comment below if you have any questions, or share this with a friend who also might need some TTB help!
Are you tired of not being able to kip your TTB?
Enter your email below to get FREE Toes to Bar kipping tip straight to your inbox!
I’m a new level 1 instructor and your videos not only are amazing to help me get better they are giving me loads of info from a coaching stand point. Thank you!
Thanks so much Roni – happy to help out both athletes and coaches 🙂
Woohoo! Glad to hear it, Roni.
Great article and tips. At least I was getting one thing right – it was so hard that every time I pushed to touch the bar I yelled “F@&$”! (At least that’s what it looked like you inserted as the LI in FLICK looked like a U to me)
Hahaha – Hey, whatever helps Craig!! Hopefully, you’re sticking with ShoulderROM and keeping those shoulders happy for your TTB work 🙂
Ha! Yeah when I first saw the .gif it made me look twice 😉
What muscles are you focusing on? Hip flexor, shoulders or leg muscles?
TTB will work a ton of different muscles, but abs, lats, and hip flexors are probably the most prevalent.
[…] >> Here’s our full article about how to learn TTB. […]
[…] dare you to finish those five toes to bar reps. Even if your grip is starting to fail. Simply drop off the bar (for safety), wipe your hands […]
[…] 21 T2B subbed (from WodPrep T2B Progressions)6 beat swings4 kipping levers4 knee raises4 knee to chest3 toes to […]
Hello,
When I try to do toes to bar, I can do a maximun of three reps of toes to chest and then my hands slip off. How can I avoid hand slip off?
Hi Mariandreina – it sounds like you might need to work on grip strength, which is something you will develop over time, the more you hang from the bar. Have you tried using chalk or grips if the bar is particularly slippery?
This is great explanation. Been researching and trying to figure out how to do this. I attend to over think T2B. Thank you for the tips