The Complete Guide To Chest To Bar Pull-Ups: Strict & Kipping

“So what are chest to bar pull-ups?”, I asked my coach at day two of CrossFit®.

They were written up on the whiteboard, and while the name of the movement seemed pretty self-explanatory… I couldn’t help but wonder, why were there so many different kinds of pull-up names? And… who cares if I can touch my chest to the bar?

What I quickly learned was that chest to bar pull-ups are the ‘next step’ up from chin-over bar pull-ups… that they are more challenging… and frequently programmed in WOD’s.

(Beginners tip: chest to bar pull-ups are often abbreviated as CTB or C2B on the whiteboard.)

So if you’re here and reading this, you might be wondering what the heck chest to bar pull-ups are, how to do them, and how to get stronger for them. Maybe you’re even working on strict chest to bar pull-ups (and if you’re not working strict, you DEFINITELY need to start!)

All of the above is covered in this article, let’s dig in.

Chest to Bar Pull-ups: Strength Check

Like all gymnastics movement, it’s important to make sure that you’re strong enough to start training for the movement before anything else. Technically, this is the progression when learning pull-ups for CrossFit:

Chest to Bar Pull-ups: Strength Check

Like all gymnastics movement, it’s important to make sure that you’re strong enough to start training for the movement before anything else. Technically, this is the progression when learning pull-ups for CrossFit:

  1. Get your first strict pull-up
  2. Build up to 3-4 (or more!) strict chin-over-bar pull-ups
  3. Work on kipping pull-ups, then expand to larger unbroken sets
  4. Increase difficulty toward chest to bar pull-ups – kipping or strict (preferably both).
  5. Work on butterfly chest to bar pull-ups (we normally only recommend these if you are competing and can already do at least 10 unbroken kipping chest to bar pull-ups)

Chest to Bar Pull-up Progression & Movement Cues 

A chest to bar pull-up is just like strict or kipping pull-ups, except you’re just pulling yourself a little bit higher – right?

Ehh… sort of.

I see a lot of athletes who are able to easily get their chin above the bar, but seem to be missing those last few inches to get their chest to actually hit the bar (your collar bone or below needs to contact the bar for the rep to count).

While some people make the extra few inches of pulling look easy, if you’re reading this, chances are you need a little help. Let’s break things down step by step:

C2B Pull-Ups Step 1: Grip

Once you’re under the bar, jump and grip just slightly outside of your shoulders. Personally, I tend to like my grip slightly wider during a chest to bar pull-up than my normal kipping pull-up. This helps create space for the chest to contact the bar.

Anytime you’re kipping on the bar, I recommend wrapping your thumbs fully under the bar in a “gymnastics hook grip”, versus wrapping your thumbs over the top of the bar in what I call the “suicide grip”. This makes sure that you don’t go flying off the bar if your grip starts to fail.

Now that you’re hanging on the bar, you should initiate the kipping movement in a hollow body position. Keep your core tight, and use your arms to begin to push back, and then under the bar.

C2B Pull-Ups Step 2: Hollow Body. 

how to do chest to bar pull-ups


C2B Pull-Ups Step 3: Arch

Once you’re under the bar, move into an arch position. Maintain tension, focus on keeping your legs straight (and not breaking your knees) and send your head through your arms as if you’re looking through a window.

chest to bar progression


C2B Pull-Ups Step 4: Kip Up & Away & “Scoop”

Once again pass back under the bar, and this time use momentum to kip upwards. At this point you’re moving back into a hollow body position, but also “scooping” your feet under the bar in the opposite direction of your shoulders. So, your head/shoulders are moving up and away from the bar while your feet/legs start to move vertically. There should be a slight bend in the hips/knees, which allows you to initiate the next step….

chest to bar pull-ups


C2B Pull-Ups Step 6: Hip Pop & Pull

The hip pop is what allows to finally pull your chest up to the bar. Just before the apex of your kip, pop your hips open while pulling your chest directly into the bar. You can also think of it as a “hip thrust” or a “butt squeeze” depending on which gives the best mental image. It should be sharp and quick, almost unnoticeable when done smoothly.

chest to bar pull up drills

C2B Pull-Ups Step 7: Elbows & Shoulders Down 

This is going to be key – even more with chest to bar pull-ups than normal pull-ups. 

If your elbows and shoulders happen to be pointing back instead of down, you’re losing out on a ton of pulling power. It’s a small cue, but could be the change that is needed to pull your chest up those last few inches to the bar.

C2B Pull-Ups Step 8: Push Away

Just because your chest hit the bar doesn’t mean the work is over – it’s time to correctly set up for the next rep. Once you contact the bar, push away from the bar and back into that hollow position. This is going to help keep the momentum needed to move back into the arched position, and into the next rep. As you push away, move your feet in front of you, keeping legs and core tight.

chest to bar pull-up

Chest to bar Pull-ups: Major Key Alert

If you were to head over and read our kipping pull-ups post, you would notice that the cues here are basically the same.

The main differences in the two pull-up movements are:

Slightly longer rep cycle (since you’re moving a few inches further)

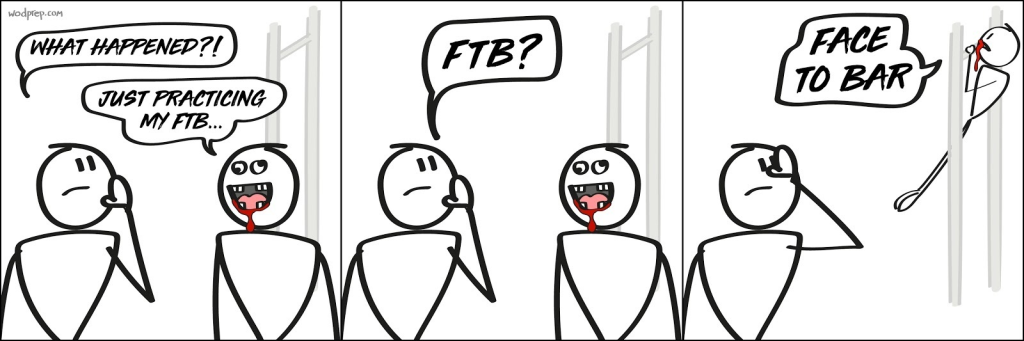
Remember, the hip pop & pull should be happening almost at the exact same time. If you still find yourself struggling to get high enough, try focusing on pulling to your belly instead of your chest. Because if you try pulling to your chest and miss… it could be your teeth. 

A more aggressive hip pop

Pulling longer and harder with your arms
 

Here’s another quick review of kipping chest to bar – do’s and don’ts.

Drills for strict (and kipping) chest to bar pull-up strength

Building strength for strict chest to bar pull-ups is never a bad idea; the strength gains are also going to translate into you kipping C2B’s as well. Let’s take a look at two of my favorite drills to build strict strength.

More often than not, athletes are missing the strength to pull those last few inches – the end of the movement. The fix? Work the full range of motion (of a chest to bar pull-up) under load.

C2B Drill #1: Single Arm Bent Over Row

Pick a dumbbell weight that is going to allow you to do about 6-8 reps on both sides with fatiguing. With the dumbbell in one hand, bend over so that your chest is square to the ground and the spine is flat, and pull the weight back to your side, hold, and lower back down. Here’s a quick demo:

C2B Drill #2: Lat Pull Downs

If you have a lat pull-down machine to use, that’s great! If not, try looping a band around the top of the pull-up rig, and putting a PVC pipe through the other side of the band – mimicking a lat pull-down machine. Like Coach Ben is doing below, sit on the floor and pull-down, fully engaging your lats.

You may have done different kinds of lat pull-downs in the past, but the key when specifically working on chest to bar strength is to be pulling the full range of motion under tension, and getting that PVC pipe all the way down to your chest line.

Chest to bar pull-up modifications

There are a few drills that I recommend athletes trying out if they can’t quite get chest to bar pull-ups, but want to still work on them during workouts.

Banded chest to bar pull-ups – strict and kipping

Just like normal banded pull-ups, loop a resistance band around the pull-up bar. The thicker the band, the more assistance you will get. Then carefully (use a box if you need to) step one foot into the band while hanging from the bar. Wrap your other foot around to secure the band. Assume the hollow body position, and initiate the pull-up.

Another option is to go the double band route – a drill that Coach Brent recently cooked up. The concept is the same, except this time loop two bands around the pull-up bar – fairly wide on the bar, outside of where you will grip. Then pull both the bands down and together, creating an overlapping loop for you to stick your feet it. Unlike a single band – you won’t be getting a band in your face, and it allows for the full arch part of the movement.

Disclaimer: While banded movements are great alternatives when learning new movements, don’t let the band become a crutch! Make sure you’re doing a variety of drills, and not always grabbing that band when you see pull-ups programmed. Don’t be like this guy…

chest to bar drills

Normal kipping pull-ups

If you see chest to bar pull-ups programmed on the board but know that you can’t consistently do them yet, normal kipping pull-ups are going to be the next best thing. You’re ultimately working similar muscles and going through the same motions. Be mindful of your form, and try to focus on continuing to pull yourself higher while kipping. Before you know it, your chest will be hitting the bar.

Good luck – try out some of the drills, and let me know how it goes!

Frequently Asked Questions

What is a chest-to-bar pull-up and how does it differ from a regular pull-up?

A chest-to-bar pull-up requires the chest – not the chin – to make contact with the bar at the top of each rep. That extra few inches demands significantly more pulling strength and a more aggressive hip drive through the kip. Regular pull-ups only require the chin to clear the bar, which is a much lower standard. Most athletes who can do 20 kipping pull-ups unbroken find chest-to-bar cuts that number roughly in half when they first attempt it.

What technique is most efficient for chest-to-bar pull-ups in CrossFit®?

Butterfly kipping is the most efficient technique for high-rep sets once it is dialled in. The continuous circular motion allows faster cycling than kipping, which requires a pause at the bottom. That said, clean kipping pull-ups that consistently meet the contact standard beat sloppy butterfly that starts missing contact under fatigue. Learn kipping first, build the butterfly once your kipping chest-to-bar is solid and unbroken.

How do I get my chest to actually reach the bar?

Two things need to happen: you need enough pulling strength to get high enough, and you need an aggressive hip drive at the top of the kip. Most athletes who stall at chin height are pulling with their arms and not using their hips. Practise jumping chest-to-bar pull-ups to learn the feeling of the chest contact, then transfer that feeling into your kipping reps.

What is a realistic training progression for chest-to-bar pull-ups?

Start with strict pull-ups to build the base pulling strength. When you can do 5-8 strict pull-ups, add kipping. When kipping pull-ups are solid, add band-assisted chest-to-bar work to learn the height requirement. Then move to unassisted kipping chest-to-bar, focusing on contact quality before volume. Once you can do 10 unbroken consistently, start building sets toward 15-20.

How many chest-to-bar pull-ups do I need for CrossFit® competition?

15 unbroken is a practical Open-ready standard. Open workouts with chest-to-bar regularly program 15-21 reps per round, and athletes who can only manage sets of 5 spend most of the workout at the bar resting. Build to 15 unbroken with consistent contact on every rep before treating it as a competition-ready movement.

Ready to Stop Guessing and Start Making Progress?

You do not need more random workouts.
You need a plan that helps you train with purpose, improve the right skills, and show up more confident when it matters.

That is exactly why we built WODprep Academy.

Inside WODprep Academy, you get training built for real athletes who want to improve without wasting time on things that do not move the needle.

You will get:

  • Courses that build real strength, engine, and skill
  • Clear progressions for movements that have been holding you back
  • Daily programming that matches your level and your lifestyle
  • A way to actually put your new skills into practice inside real training
  • Coaching and structure so you know what to do next
  • A smarter system that helps you stay consistent and keep improving

This is not about doing more work.
It is about doing the right work, consistently, so your fitness actually improves.

Join WODprep Academy, and start training with a real plan.

Need help with Pull-ups?

Try Our Free Pull-up Training Programs To Take Your Pull-ups To The Next Level!

Related Posts

Strict Ring Muscle-Up vs Kipping: Mastering Two Paths to RMU

Ring Muscle-Up Transition: A Practical Two-Drill Anchor for Open Prep

Bar Muscle Up Progression: From Pull-Up to PR

Best Bar Muscle Up Grips: Protect Hands, Improve Turnover, and Performance

Bar Muscle Up Transition Fixes: Get Over the Bar Smoothly

Bar Muscle-Up Chicken Wing: Causes, Fixes, and Progressions for Balanced BMUs

Bar Muscle Up Mistakes: Why You Keep Failing & How to Fix Them

Advanced Bar Muscle-Ups: Linking Reps, Rhythm, and Unbroken Sets

What’s the ONE thing holding you back from going Rx?

Follow the step-by-step plan inside WODprep Academy and build the strength + skills to go Rx with confidence.