So, you think you’re ready to work on bar muscle ups?
Before reading further, check out WODprep’s prerequisites for bar muscle ups for beginners. These guidelines are in place to make sure you have the strength to start safely working on BMU’s.
(keyword = safely)
How strong do you have to be to do a bar muscle up?
- Can you do a few strict pull-ups in a row? I suggest at least 5 unbroken. 6+ is even better!
- How are your kipping chest to bar pull-ups? When I work with athletes one-on-one, I make sure they can do 4 or more unbroken.
- Last one... Toes to Bar! I know it seems odd, but TTB proficiency is a major prerequisite. I'm looking for 5 or more, and yes, 6+ is even better.
If you can check off those three pre-reqs, then read on. It’s time to get up and over that bar.
Breaking down Bar Muscle Ups for Beginners
First, let’s break down the BMU so that we fully understand the movement.
1. Hollow Body
When jumping up to the bar, hands should be about shoulder-width apart. Begin in a hollow body position, with your core and lats activated.
How do you activate your lats? Think of it as ‘pulling down on the bar’ with straight arms, as you hang. It’s actually more similar to kipping TTB than a kipping C2B. Try both and you’ll feel the difference.
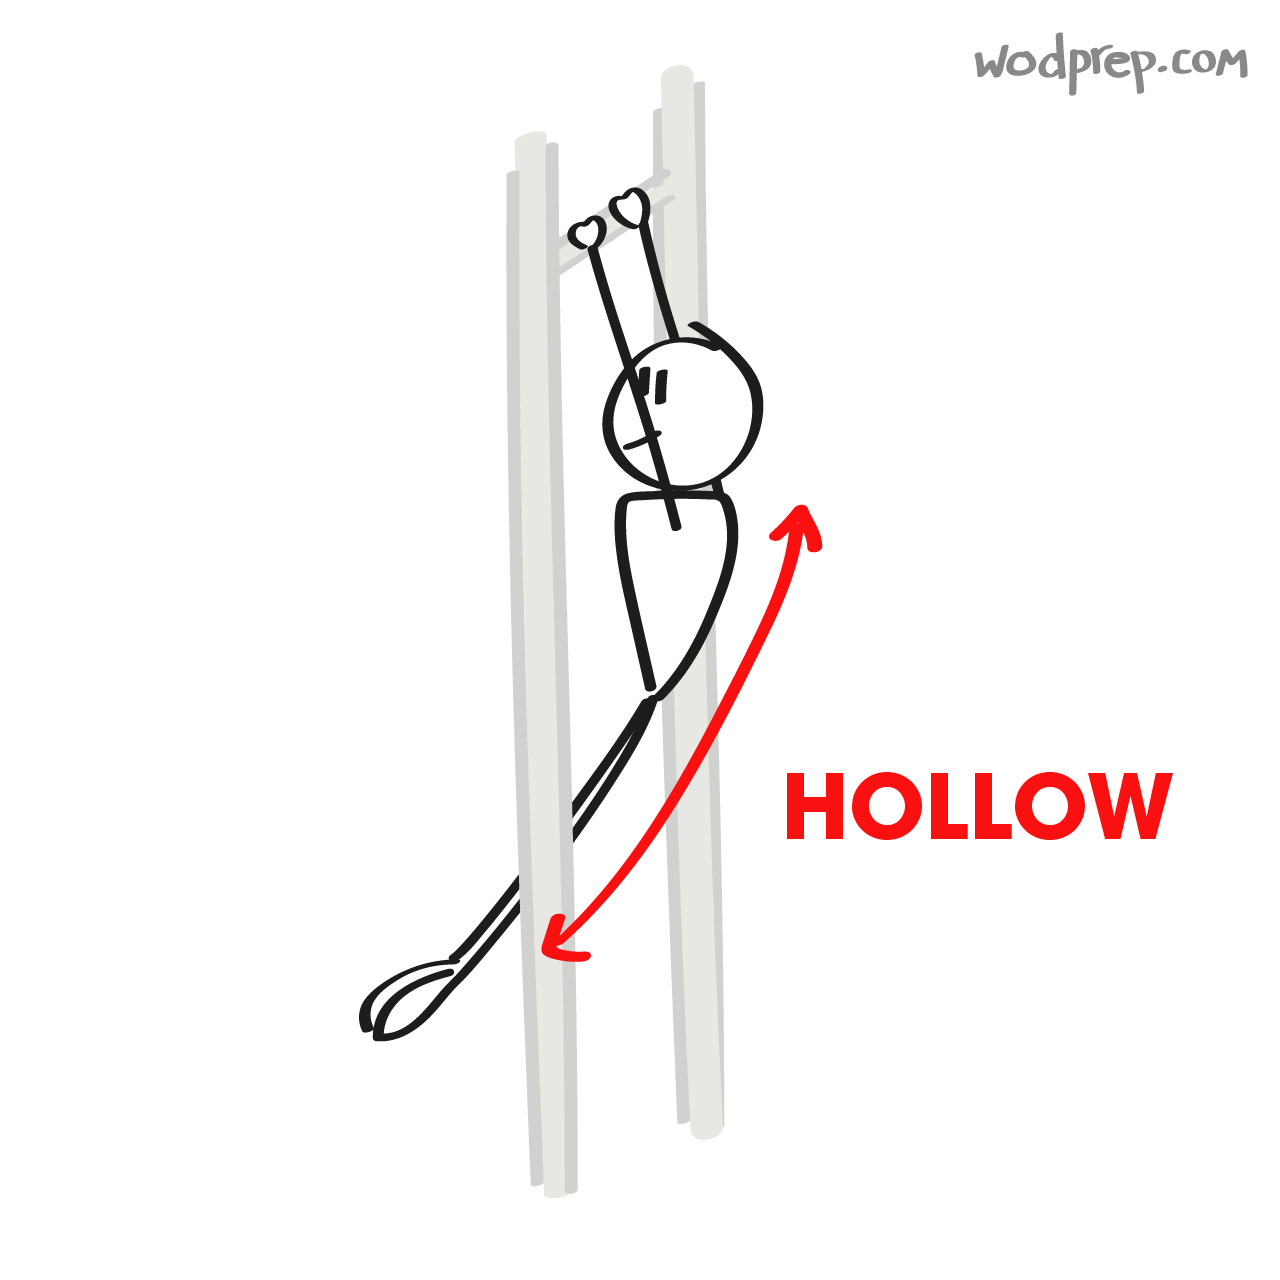
Tip: If you actually jump into your hang (while maintaining hollow body position) this can help to give you a bit more momentum to get above the bar.
2. Arch
From hollow body, move under the bar into an arched position. This movement should create tension throughout your entire upper body; think of it as almost becoming a ‘bow’. Try not to bend your knees, as this tends to cause tension loss.
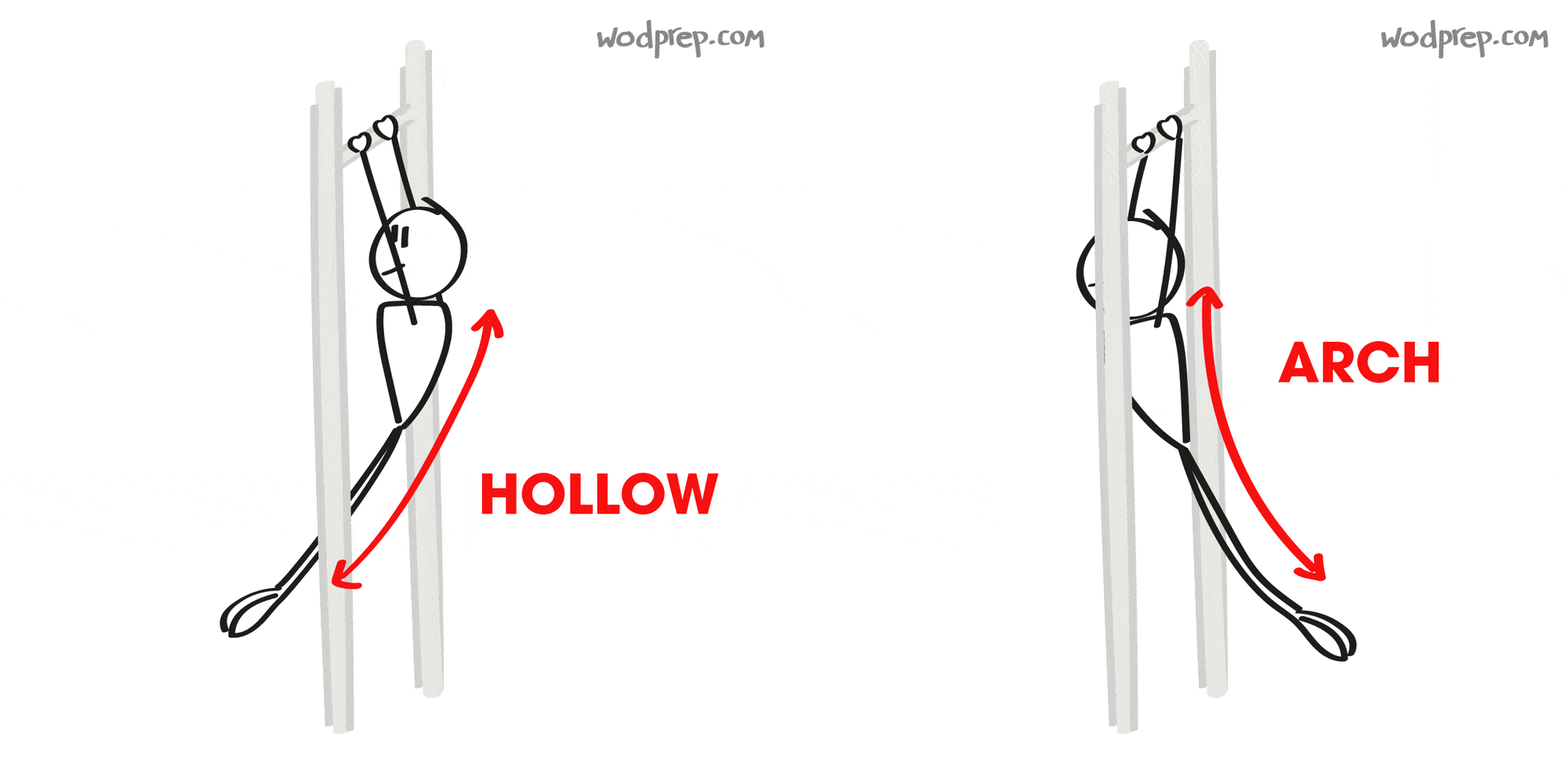
3. Up & Away
From the arched position, travel back under the bar back into the hollow position (but with more momentum). A key here is to keep legs extended and activate your lats as you ‘lever’ yourself back, and then up above the bar.
During this step your shoulders should be moving both up and away from the bar. This is different from a pull-up where you’re pulling up and straight into the bar.
Instead think: up and away.
The space created when moving up and away from the bar is what will allow you to flip up and over the bar. While levering back during this step, maintain a slight bend in your knees and hips. Without that bend in your knees and hips, you won’t be able to transition into the next part of the movement; the hip pop.
4. Pop & Pull
The hip pop is what forces your hips into full extension. Not sure how to pop your hips? Try squeezing your butt as tightly as you can - this will force full hip extension. The pop gives you momentum to then pull yourself into the bar, almost mimicking a bar row towards your belly button.

5. Fast Sit-up
While pulling, think about transitioning into doing a really fast sit-up.
If you were to watch a bar muscle up in slow motion, these two movements should be happening with a very slight overlap - pop & pull - no pausing in between. If you wait too long to pull after the hip pop, you might end up too far from the bar to sit up and over.
In some cases, I tell athletes to imagine that they are wearing a hat. Your goal during the transition should be to “throw the hat off your head”. You can also think about “breaking glass”. If there was a sheet of glass over the bar, your transition should be so aggressive that your head would break through!
6. Lock Out
Once you’re up above the bar, take a few seconds to settle. This is important especially if you’re a beginner. While in the dip position over the bar, pause for a moment to find your balance, regain your composure, and then complete the movement by pressing out to lock out your arms.
There’s no point in rushing the transition and failing the rep after you’ve made it that far.
Quick BMU recap:
- Hollow Body
- Arched Position
- Up & Away
- Pop & Pull
- Fast Sit-up
- Lock Out
Here’s another bar muscle up article that breaks down the movement, if you’re looking for further explanation.
Bar Muscle Ups For Beginners: Your Grip is EXTREMELY Important
Let’s talk grip. It may seem like a small detail, but it’s actually a pretty big deal. Too tight of a grip will prohibit you from rotating correctly… while too loose of a grip will send you flying off the bar.
Note: It helps to start with your hands wrapped as far around the bar as possible. In other words, your knuckles should be above the bar, rather than below. It is similar to a “false grip” on the rings, but not quite as high. As you improve your efficiency, you’ll move away from such an aggressive false grip.
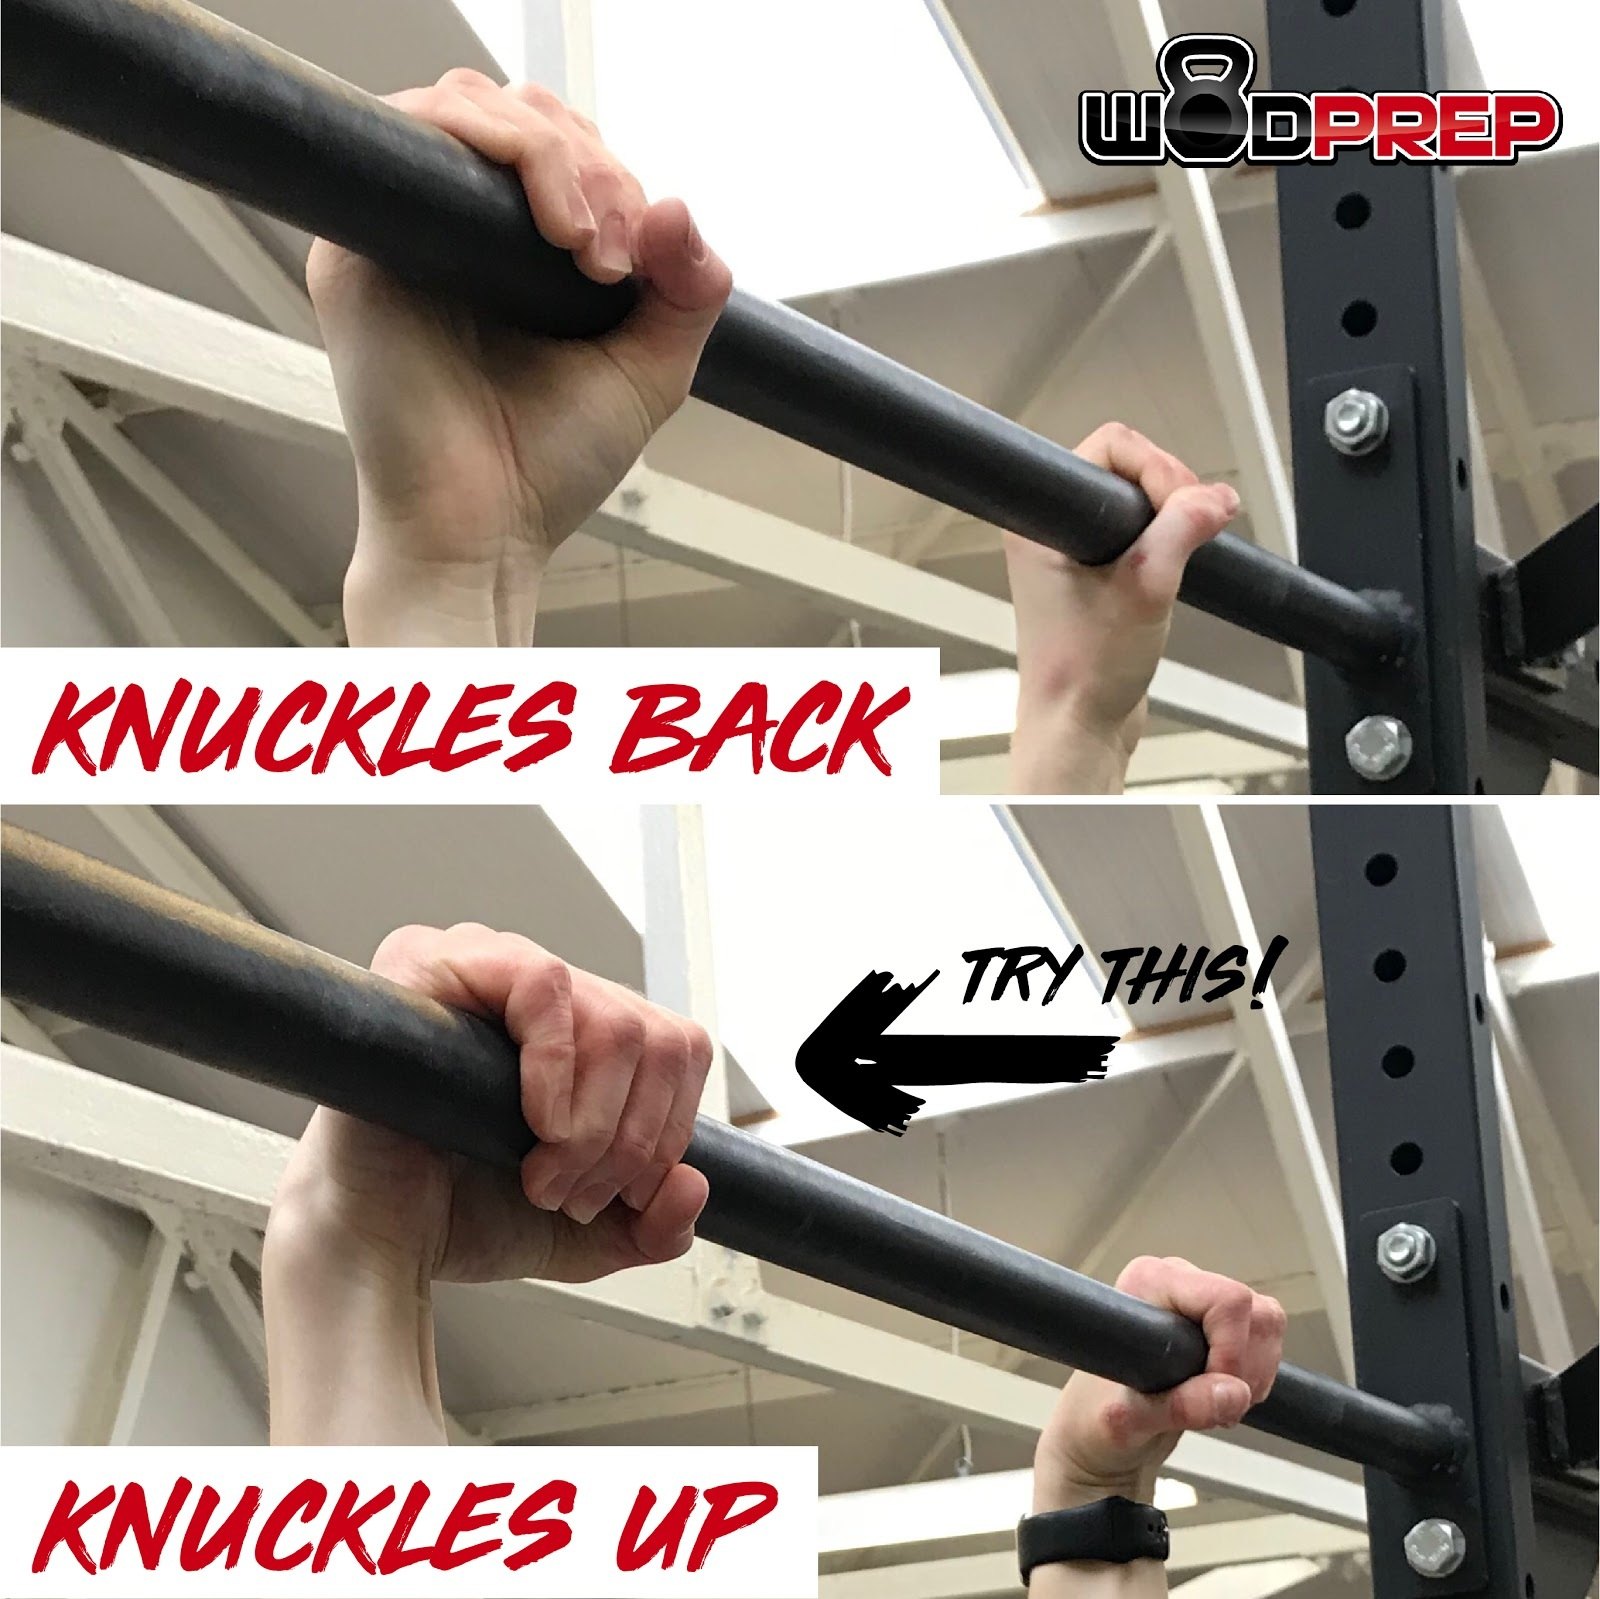
Here is another cue that you MUST remember: let your hands slide around the bar.
Without letting your hands slide around the bar, you will get stuck in the transition, failing every single rep. Instead, you must be comfortable with letting both of your hands rotate from below to above the bar. This happens directly after the “pop and pull”, when you’ll be floating above the bar and consequently won’t have as much tension on your grip.
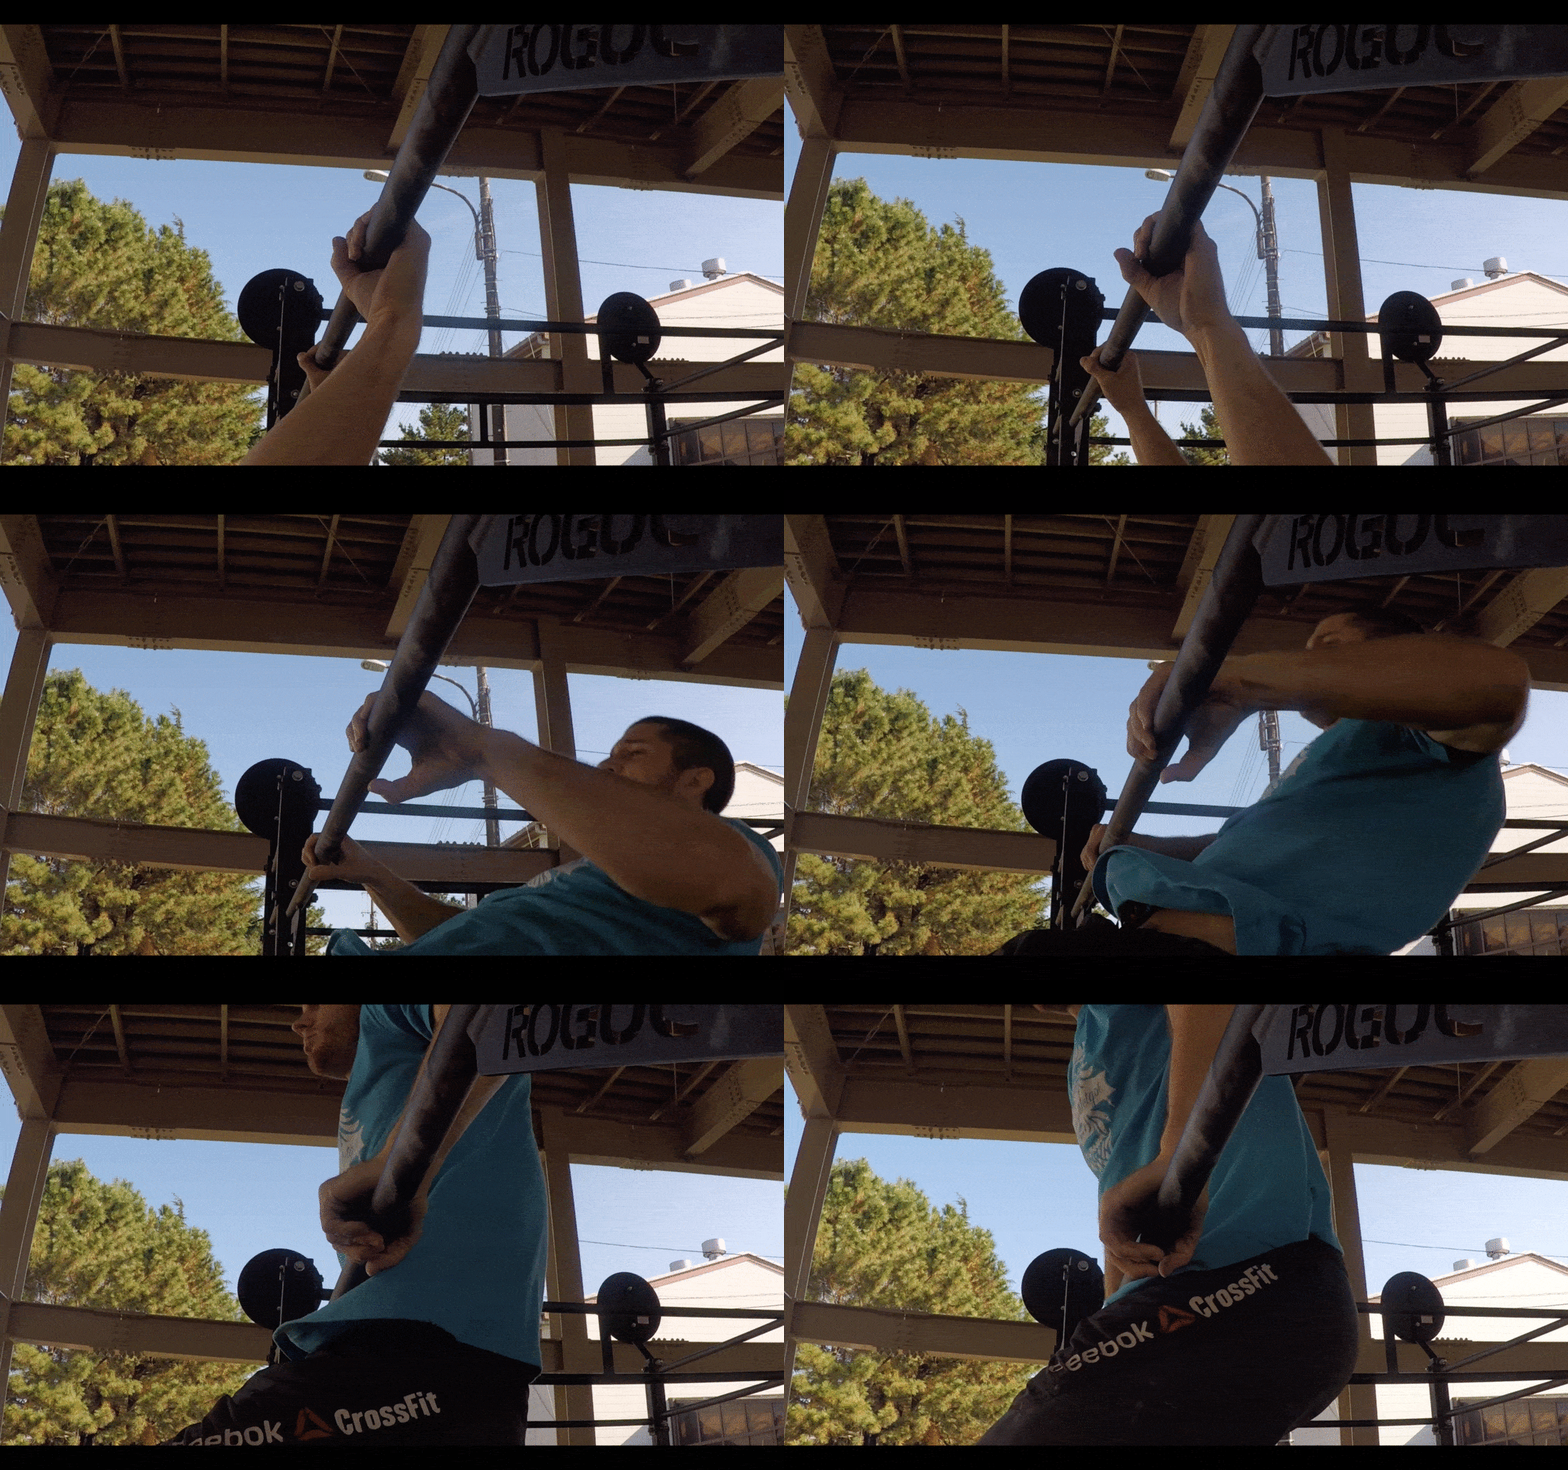
If you find yourself ‘death gripping’... during the next rep, focus on releasing both hands as you ‘pop and pull’ (as seen above) and you should be able to get that rotation around the bar that you need.
Here’s a more thorough explanation on the topic:
Best Bar Muscle Up Drills for Beginners
There are a few different drills that I recommend when teaching bar muscle ups for beginners; let’s take a look at two of my favorites.
Jumping Bar Muscle Ups
How to do the drill:
Once standing on the box, grab the bar about shoulder width apart. Stand slightly back from the bar, mimicking a hollow body position (without actually hanging). Check it out:
Banded Bar Muscle Ups
For this drill, grab a band based off of how much assistance you want with the movement; if you need more help, grab a thicker band. If you think that you’re right on the verge, try a thinner band.
How to do the drill:
Wrap your band around a pull-up bar that has enough clearance for you to do a kipping bar muscle up on. Using a box if you need to, put one foot inside of the band. The other foot should wrap around on top of your banded foot, to keep the band secure.
Drop into your starting hang position, and then initiate your kip for a bar muscle up. The band is going to provide you a little more assistance, while still mimicking an Rx bar muscle up.
Why try this bar muscle up drill?
Banded bar muscle ups are a great way to help beginners work on their form, while also correcting some bad habits like the chicken wing.
I also sometimes suggest that athletes try this out during actual workouts. Instead of having to scale down to pull-ups, set up a band for the WOD that will allow you to work on your bar muscle up reps, without sacrificing form. This goes along with the mindset of scaling reps, not ROM.
Bar Muscle Ups for Beginners: How to build strength
If you are feeling close to getting a BMU and want some strength-building exercises that will help you get up and over that bar, here are some of the WODprep coaches’ favorite drills to try out.
Hollow & Arch Rocks
Remember the hollow and arch positions from above?
To help develop the strength needed to move through these positions on the bar, work on them from the floor first. On your back, bring your hands above your head and legs slightly off the ground, forming a slight ‘c’. With a tight core and glutes, hold this hollow position for a few seconds, rest, then repeat.
For arch holds, roll over to your stomach. Again, bring your hands over your head (just like you’re doing a superman) and your legs off of the ground. Stay tight, and hold this arch position for a few seconds.
Single leg glute bridge
Strong glutes are what help with that final ‘hip pop’ to bring your body up towards the bar, so this is a great drill to help strengthen them.Move to the floor again, on your back. Bend your legs so that your feet are flat on the floor - but not too close to you so that you can’t fully extend into a bridge. If you can lightly touch your heels with your fingertips, you’re in the right place. Bring one leg up to your chest and hug it, while pushing through the opposite glute into a bridge.
Repeat a few times, then switch legs.
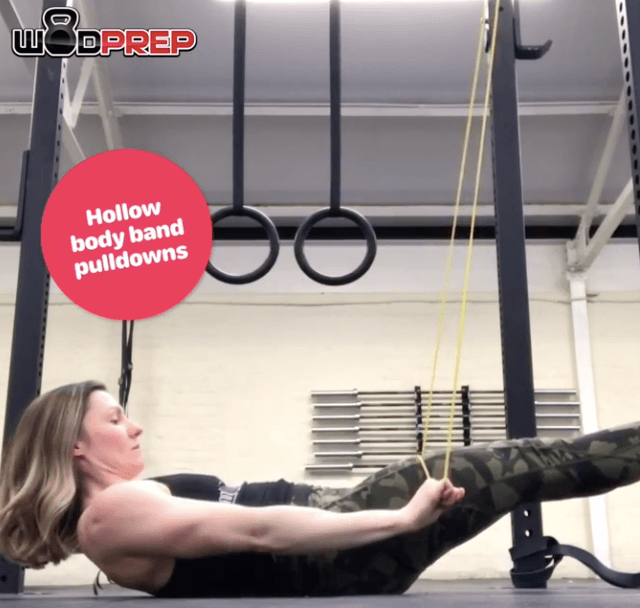
Hollow Body Band Pull-downs
This exercise is great to help develop lat strength, while also mimicking the straight arm engagement during a bar muscle up.
Wrap a band around a rig, that has enough slack so that you can pull the band all the way to the floor. Assume a hollow body position on your back, and start with your arms straight in front of you holding the band. Remaining hollow, pull the band down towards your body, finishing over your legs as pictured below. Do a few sets of these at a volume that is challenging.
Bar Muscle Ups For Beginners: What next?
OK, so you know the prerequisites to attempt bar muscle ups… the breakdown of the movement… drills to work on BMU’s, and how to build the strength.
What’s next?
If you’re looking for even more free bar muscle up training for beginners, check out our free BMU mini course:
As always, let us know if you have any questions, and good luck!
Tired of failing Bar Muscle Ups? Get FREE access to our 7-part BMU Video Course.
